First of all, please read the following laser safety operation guidelines carefully before operation:
· Please ensure that you operate the NewFeel laser projector equipment in the safest possible way and comply with the relevant safety regulations of the place where your laser equipment is used;
· Do not look directly into the laser beam or the laser exit hole. Please ensure that no one enters the laser beam scanning area during laser installation and testing; at the same time, please avoid laser projection on the surface of reflective objects;
· Including us - the producer of this video, or NewFeel Laser Co., Ltd. - as the manufacturer of this product, does not assume any responsibility for property damage, or safety damage, in the following video how-to guide.
· You will be solely responsible for this.
Do The NewFeel Laser Light Quick Start Guide
by Newfeel Ho on Feb 13, 2022
Teaches you how to use the lasers lights correctly and set up the Pangolin laser control software.
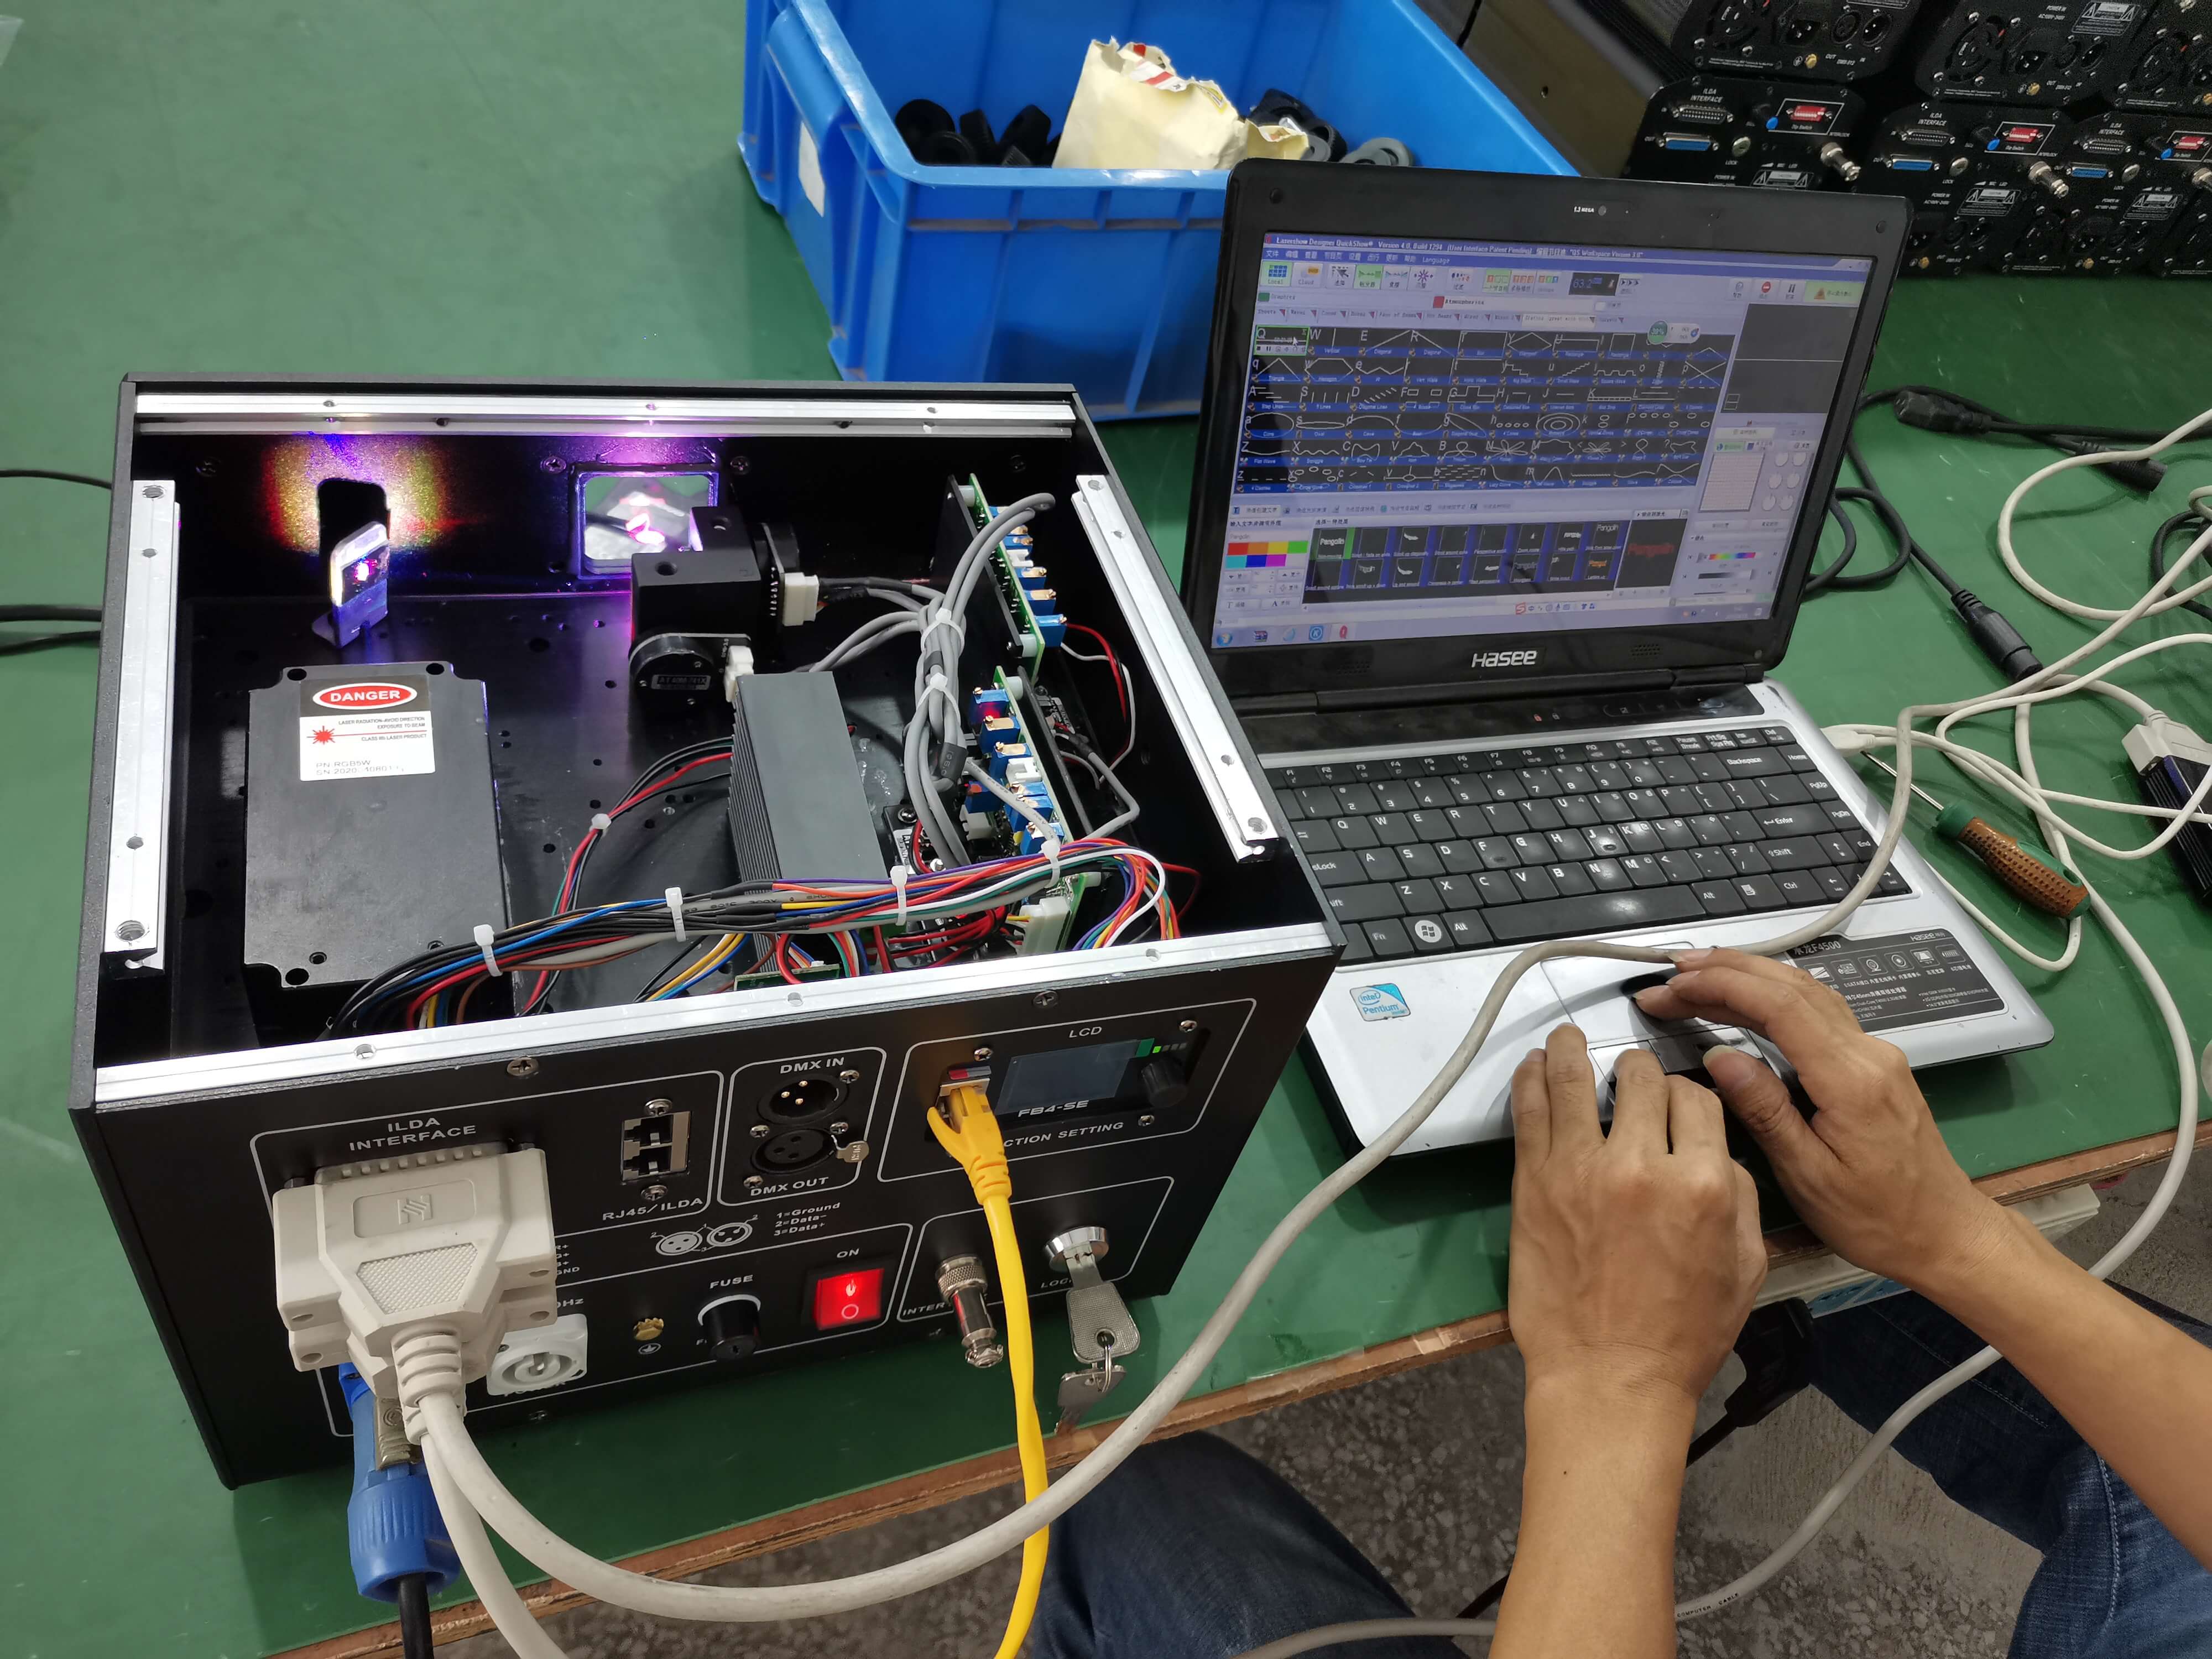
Setting up the NewFeel Laser Projector System, Basic Connection Operation

1. Open the air box and take out the laser projector and accessories.
2. Find a safe place to project on a flat surface.
3. First connect the emergency stop remote. Use the female connector 3 XLR of the cable provided by the laser light manufacturer to connect to the XLR of the socket on the rear of the laser light device, marked as remote input. The emergency stop remote socket on the other end is marked as an input.
4. Then use the provided security keys, one inserted into the laser projector and the other into the emergency stop remote.
Next, we connect the lasers lights to the laser control unit.
5. Use the Ethernet cable to plug into the jack on the back of the laser projector, marked as Ethernet. No matter which one you use, it will work fine. the other end of the ether-net cable to control the network port on the computer.
6. Finally, use the supplied power cable TRUECON yellow/black connector to connect the power to the laser projector.
(Please note that there are many different ways to control the NewFeel laser light. In this guide, we'll use the most common control called Network Mode. It means we control the laser projector with the Pangolin QuickShow software from the computer via ethernet.)
Now it's time to open the front light outlet of the laser light. Make sure you don't look directly at it from either side!
Start the system, switch the safety critical position and check that the emergency stop remote button is released. If not, pull up on the red cap. Then, press the start button on the remote. For a few seconds, the system prepares to emit laser radiation and waits for commands to control the system.
To check that the built-in FB4 interface is set to the correct control mode, perform the following steps:
· Press the button behind the knob laser light
· Select menu mode
· Select the BEYOND/QS option - a green check mark indicates the selected control method
· The laser system is now ready for action Let's tackle the control system.
· Press the button behind the knob laser light
· Select menu mode
· Select the BEYOND/QS option - a green check mark indicates the selected control method
· The laser system is now ready for action Let's tackle the control system.
Install QuickShow Laser Control Software
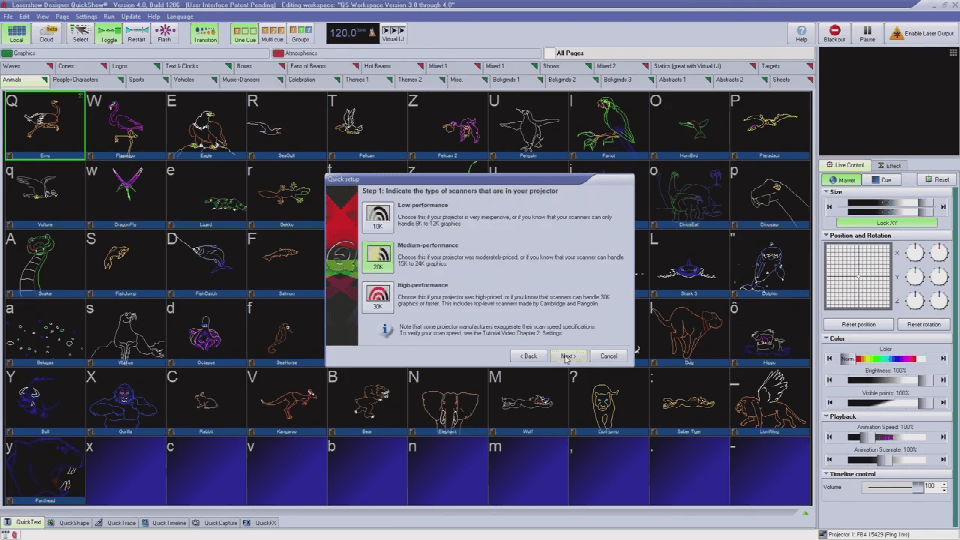
Start your computer as usual. The latest installation files can be downloaded and installed via Pangolin's website. Install QuickShow laser control software.
After installation, launch the QuickShow program and follow the on-screen registration and update instructions. Once complete, QuickShow will take you through the quick installation process.

There are three important parameters you have to choose from the options available in Quick Setup if you NewFeel Laser Full Color:
· High performance scanner
· Tri-color laser RGB projector
· Analog color system
After completing the above steps, you can now do some laser projections!
Click Laser Output in the upper right corner of the QuickShow window. Select the logo you want in the program pool on the left, and you can generate a laser.
The above is the use method of the stage laser light organized by Newfeel for you: the introductory guide that laser novices can learn, I hope to help you! If you want to control the laser in other ways, such as the supported lighting console, pay attention to the NewFeel Laser website, and we will provide you with more useful tutorials in the future, so stay tuned.


